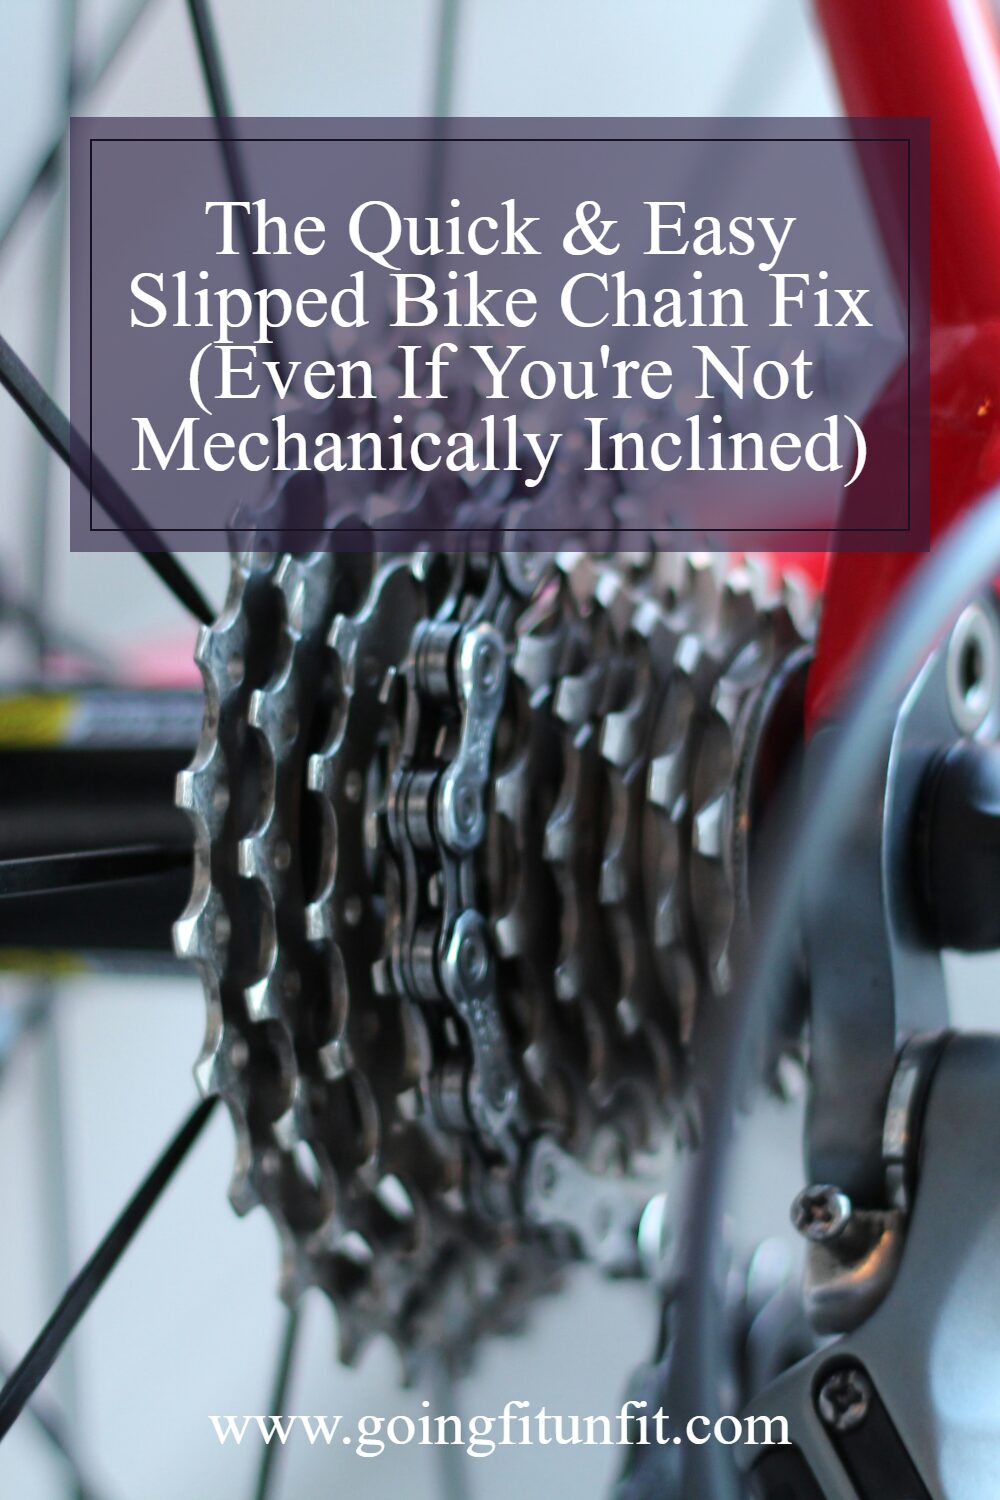
Why Every Cyclist Must Know the Perfect Slipped Bike Chain Fix
Having your chain come off mid-ride is like hitting a virtual wall in your cycling journey – one moment you’re cruising along, feeling the wind in your hair, and the next you’re stranded with a useless bike. I’ve been there more times than I care to admit, and that sinking feeling never gets easier. Luckily, a slipped bike chain fix is much simpler than most cyclists think. With just a few easy steps, you can be back on the road in minutes, no bike shop required.
Cyclists know that chain issues are practically a rite of passage. Sooner or later, every rider will face a slipped, damaged, or worn-out chain. The good news? This common problem can be solved with your bare hands and a little know-how – no expensive trip to the repair shop necessary.
I’ve found that learning to fix your bike chain is like having a cycling superpower – it’s an essential skill that’s surprisingly easy to master and costs virtually nothing to maintain. In this comprehensive guide, I’ll walk you through exactly how to fix a slipped bike chain, properly remove one when needed, and even replace your chain if the situation calls for it.
Understanding Bike Chain Basics: The Foundation of a Successful Slipped Bike Chain Fix
Before diving into repair techniques, let’s understand what we’re working with. Think of your bike chain as the vital circulatory system of your bicycle – it transfers your energy from the pedals to the wheels, making movement possible.
Bike chains come in two main varieties that require slightly different approaches when fixing a slip:
“One-speed” chains: These are for single-speed and fixed-gear bicycles. Often called “1/8th inch chains” due to their standard width, they’re the simplest type to fix when slipped.
Derailleur chains: Designed for multi-gear bikes, these chains are narrower than one-speed chains because they need to navigate between multiple sprockets. When these slip, the derailleur (that mechanical arm that moves your chain between gears) comes into play during repairs.
Your chain consists of four critical components that work together like a well-choreographed dance:
Outer plates: These flat, figure-8-shaped metal pieces connect one set of inner plates to the next, allowing the chain to articulate as it moves.
Inner plates: Similar to outer plates but with special rims around their holes that secure the rollers.
Rollers: The small metal cylinders that rotate around the pins and directly contact your bike’s sprocket teeth.
Link pins: These metal rods hold everything together, connecting the plates while serving as axles for the rollers.
Some chains also feature a “master link” – a special link designed for easy assembly and disassembly without tools. When doing a slipped bike chain fix, identifying whether you have this feature can make your job much easier.
The 6-Step Slipped Bike Chain Fix Process That Works Every Time
When your chain suddenly slips off during a ride, it feels like your entire day has been derailed. But don’t worry – I’ve developed this foolproof system that works like a charm every time:
Step 1: Try the Downshift Method to Fix Your Slipped Chain
Often, the simplest solution works best. While you’re still moving (if possible), use your gear lever to downshift to the lowest gear. This moves the chain to the biggest ring position and can sometimes automatically reset a partially slipped chain. I’ve saved countless rides with this 5-second fix!
Think of it like gently guiding a derailed train back onto its tracks – with the right angle and a bit of momentum, the chain can find its way home.
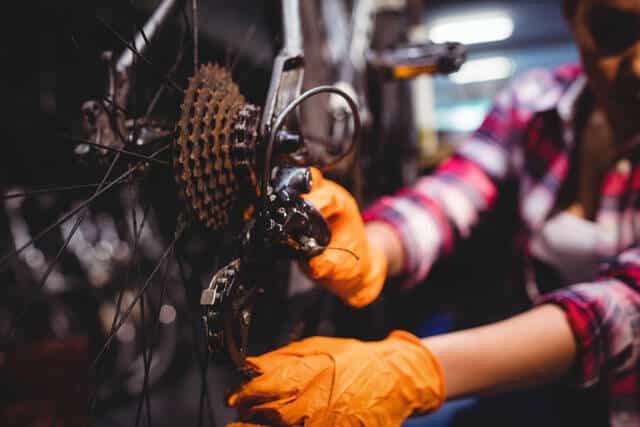
Step 2: Position Your Bike Properly to Access the Slipped Chain
If the quick downshift didn’t work, you’ll need better access to your drivetrain. Either:
Secure your bike on a stand (my preferred method for cleaner, easier repairs)
Or flip your bike upside down to rest on the handlebars and seat (my go-to field repair position)
This position gives you full access to the chain and allows the rear wheel to spin freely – essential for testing your fix. It’s like putting a patient on an operating table instead of trying to perform surgery while they’re standing up.
Step 3: Release Chain Tension to Allow Easy Repositioning
Here’s where the magic happens. Use your left hand to push the rear derailleur forward as far as possible. This releases tension on the chain, creating the slack you need to work.
I’ve found this step works like releasing a taut rubber band – once the pressure is off, you have the flexibility to manipulate the chain back into position. This simple technique has saved me from being stranded on remote trails countless times.
Step 4: Reposition the Slipped Chain onto the Chainring
While holding the derailleur forward with your left hand, use your right hand to lift the loose chain and place it back onto the appropriate chainring. For most basic slips, aim for the smaller chainring at the front.
I like to think of this as threading a needle – it requires a steady hand and good positioning, but once you’ve done it a few times, it becomes second nature.
Step 5: Release the Rear Derailleur to Restore Tension
Once the chain is correctly positioned on the chainring, slowly release the rear derailleur. The spring-loaded mechanism will automatically take up the slack and restore proper tension to your chain system.
To confirm success, lift the rear wheel and turn the pedals. The chain should move smoothly through the drivetrain without jumping or making unusual noises. It’s like watching a symphony conductor restore harmony after a momentary discord.
Step 6: Prevent Future Chain Slips with Proper Maintenance
A slipped chain is often a symptom of underlying issues. To prevent future occurrences, address these common causes:
For single-gear bikes: The solution is straightforward – loosen the rear axle, pull the wheel back to tighten the chain, then re-tighten the axle. This simple adjustment is like taking in a belt by one notch.
For multi-gear bikes: Check both the chain and derailleurs. An elongated chain (stretched more than 0.5%) needs replacement, while misaligned derailleurs can often be adjusted with a simple screwdriver.
I’ve discovered that regular cleaning and proper lubrication work like preventative medicine – they stop most chain problems before they start. A clean, well-lubricated chain is far less likely to slip or cause shifting issues.
How to Replace a Severely Damaged Bike Chain When a Simple Slipped Bike Chain Fix Won’t Work
Sometimes a chain is too damaged or worn to simply reposition. When this happens, replacement becomes necessary. Don’t worry – I’ve streamlined this process into four manageable steps:
Step 1: Gather the Right Replacement Bicycle Chain and Tools
Your bike chain is the lifeblood of your cycling experience. For replacements, I personally use and recommend KMC chains of equivalent speed and size to your original chain. Their reliability has saved me from countless headaches over the years.
Ensure you have these essential tools ready:
Chain breaker tool
Master link (for connecting chain ends)
Pliers
Joining pin (if using a Shimano chain)
Think of these tools as your surgical instruments – having the right ones makes the operation smooth and successful.
Step 2: Remove the Old Bike Chain Properly
Removal depends on your chain type:
For chains with a master link: Use pliers to press the ends of the link together, then slide them apart. It’s like unlocking a special door that only opens with the right technique.
For chains without a master link: Use a chain breaker tool to push out a pin. Place a chain link into the tool and turn the handle inward until the chain pin emerges from the other side. Then carefully pull the chain apart.
I remember the first time I removed a chain without a master link – it felt like performing major surgery on my bike. Now it feels as routine as changing a lightbulb.
Step 3: Prepare Your New Chain for Installation
This critical step ensures your new chain functions perfectly:
Lay both the old and new chains side by side on a flat surface.
Mark the new chain to match the old one’s length.
Use the chain breaker tool to remove excess links, ensuring the ends are compatible (different types – narrow and wide).
If using a master link, both ends should be narrow.
I think of this as taking measurements for a custom suit – get it right, and everything fits perfectly; get it wrong, and you’ll be uncomfortable with every movement.
Step 4: Thread and Connect Your New Bike Chain
Now for the final step:
Run the new chain through the rear derailleur system – first through the bottom jockey wheel, then the top.
Pass the chain around the front chainring.
Use the pedals to position the chain correctly.
Connect the ends using your chosen method:
For master links: Join the ends and pull slightly to lock them together.
For regular pins: Use your chain tool to push the pin into position.
For Shimano chains: Use their special joining pins and remove the guide portion after installation.
The satisfaction of completing this process is like finishing a complex puzzle – all the pieces fit together perfectly, creating a smooth-running system.
Final Thoughts: Mastering the Perfect Slipped Bike Chain Fix and Maintenance
Every time my chain slips during a ride, I’m reminded of how essential this basic maintenance skill is. Over the years, I’ve learned that preventative care is the best approach – keeping your chain clean and well-lubricated dramatically reduces the chances of slips and extends the life of your entire drivetrain.
I’ve found that spending just five minutes after every few rides to wipe down and re-lubricate my chain saves me hours of frustration and potentially expensive repairs down the road. It’s like flossing your teeth – a small, regular investment prevents major problems later.
Have you ever had a chain slip at the worst possible moment? What techniques have you discovered for a quick slipped bike chain fix on the trail? I’d love to hear your stories and tips in the comments below!
Ready to Keep Your Chain in Perfect Condition?
What’s your biggest challenge when it comes to finding the right slipped bike chain fix? Do you have any clever hacks for chain issues that I haven’t covered here? Share your experiences below – your tip might be exactly what another rider needs to hear!
Kaye is a mother of two boys who is on a mission to improve her physical and mental well-being. With a passion for trying new beauty products and stacking her supplement intake, Kaye is always eager to discover new ways to enhance her lifestyle.
This post is a lifesaver! I never thought I’d be able to fix my bike chain on my own, but the step-by-step guide made it so simple. Thank you for the clear instructions and tips! Now I feel more confident tackling bike maintenance.
Thanks so much for the kind words! We’re thrilled to hear the step-by-step slipped bike chain fix helped you feel more confident with your bike maintenance. Keeping your chain in top shape is key to a smooth ride—glad we could make it easy and quick for you!
Great tips! I never knew fixing a slipped bike chain could be so simple. Can’t wait to try this out on my next ride—thanks for making it so accessible for those of us who aren’t mechanically inclined!
Hey, so glad you found the tips helpful! Fixing a slipped bike chain really can be quick and easy, even if you’re not a bike mechanic. Hope it makes your next ride smoother and hassle-free!
Absolutely, learning basic bike repairs like fixing a slipped chain can save you so much time and frustration on the road! Plus, it’s a great confidence booster, even if you’re not mechanically inclined.
Totally get that—there’s nothing more frustrating than a slipped bike chain ruining your ride! Glad this quick and easy slipped bike chain fix helped you get back on the road without any mechanical headaches.
This is such a helpful guide! I’ve always felt overwhelmed when my bike chain slipped, but your step-by-step instructions made it super easy to follow. I can’t believe I waited so long to fix it myself. Thanks for empowering us non-mechanical types!
Thanks for the kind words! I’m thrilled this step-by-step bike chain repair guide made it easy for you to fix your bike chain yourself—no more feeling overwhelmed. Empowering non-mechanical folks to tackle bike maintenance is exactly what I aim for!
This is such a lifesaver! I’ve always struggled with bike maintenance, but your step-by-step guide made fixing my slipped chain so easy. Thank you for breaking it down and making it accessible for us non-mechanical types!
I’m so glad to hear that it helped you! Bike chain issues can be super frustrating, especially if you’re not into tools and grease. Thanks for taking the time to leave such a kind comment—and happy riding


This is a great video on how to put a bike chain back on. I have never done it before, but this video makes it look easy. Thanks for sharing!
Thanks! It can be a little tricky to put a bike chain on but watching it be done def helps
This post is a lifesaver! I never thought I’d be able to fix my bike chain on my own, but the step-by-step guide made it so simple. Thank you for the clear instructions and tips! Now I feel more confident tackling bike maintenance.
Thanks so much for the kind words! We’re thrilled to hear the step-by-step slipped bike chain fix helped you feel more confident with your bike maintenance. Keeping your chain in top shape is key to a smooth ride—glad we could make it easy and quick for you!
Great tips! I never knew fixing a slipped bike chain could be so simple. Can’t wait to try this out on my next ride—thanks for making it so accessible for those of us who aren’t mechanically inclined!
Hey, so glad you found the tips helpful! Fixing a slipped bike chain really can be quick and easy, even if you’re not a bike mechanic. Hope it makes your next ride smoother and hassle-free!
It’s always a good idea to learn basic repairs
Absolutely, learning basic bike repairs like fixing a slipped chain can save you so much time and frustration on the road! Plus, it’s a great confidence booster, even if you’re not mechanically inclined.
I used to hate when my chain would slip off
Totally get that—there’s nothing more frustrating than a slipped bike chain ruining your ride! Glad this quick and easy slipped bike chain fix helped you get back on the road without any mechanical headaches.
This is such a helpful guide! I’ve always felt overwhelmed when my bike chain slipped, but your step-by-step instructions made it super easy to follow. I can’t believe I waited so long to fix it myself. Thanks for empowering us non-mechanical types!
Thanks for the kind words! I’m thrilled this step-by-step bike chain repair guide made it easy for you to fix your bike chain yourself—no more feeling overwhelmed. Empowering non-mechanical folks to tackle bike maintenance is exactly what I aim for!
This is such a lifesaver! I’ve always struggled with bike maintenance, but your step-by-step guide made fixing my slipped chain so easy. Thank you for breaking it down and making it accessible for us non-mechanical types!
I’m so glad to hear that it helped you! Bike chain issues can be super frustrating, especially if you’re not into tools and grease. Thanks for taking the time to leave such a kind comment—and happy riding