Aren’t you tired of the old rusty metal making a sound every time you pedal? Maybe its time you remove bike crank and replace it with a new one. Or you may wish to ignore it knowing where that sound is coming from; Exactly, the crank, also known as the chain rings.
The metal mechanism consists of multiple sprockets attaching the pedals to your bike and connecting to the rear spindles. This might be the simplest way to explain a bike crank.
There are several ways to remove bike crank for the replacement, and one of the most popular ways is with a puller. But even that costs a few bucks. And that’s exactly what brought you here.
You can remove and then replace your crankset on your own. The best part? You don’t have to be a know-it-all; this process only requires you to be familiar with bike repair and maintenance basics.
This article will teach you how to replace a bike crank without a puller- Step by step.
By following these steps, you will be able to change your bike crank without any hassle. However, these perks have inevitable consequences which we will discuss further in this article. Let’s get started.
Why Remove Cranks In First Place?
By now we know what bike cranks are. Now let’s understand the various reasons why we should remove cranks. There are several reasons due to which you could be forced to remove a bike crank.
One of the most common reasons to remove a bike crank is to change one. One fine morning you decide to ride your bike after a long time.
By a long time, I mean literally, your bike has watched months and seasons pass by, change from a single point. And suddenly you decide to take your bike for a ride, and every time you pedal an annoying sound follows. If you get what I am saying, then it’s high time, get your hands dirty and get through with it.
Some other reasons that can force you to change your bike cranks could be as small as monthly maintenance, service the bottom bracket bearings of your bike to changing the sprockets itself.
Whatever the reason might be, we will help you get through it especially if you’re planning to save some bucks behind the puller.
Should I Use A Crank Puller?
Well, as we’ve already mentioned that with such perks, follow inevitable consequences. And those consequences may include inflicting some additional damage to your bike.
So, it is advised that you use a bike crank puller when removing the crank. As using a crank puller will only make your work easier, faster, and safer.
The decision still remains in your hands. You could use your arms and save a few bucks for yourself while putting at more significant risk- Might even dig a hole in your pocket.
For utter safety and precaution, I don’t find a reason not to buy a crank as they cost $8.99 and more.
We recommend you to buy a crank puller( I have found a really great one that is inexpensive on Amazon ) to decrease the chances of damage to your bike.
It can sometimes cost you your bike. It’s always been, “Better safe than sorry.”

Essential Tools and Materials Required
Various tools and materials are required to disconnect the crank from your bike. But there are only a few which are essential for the work to be done. Without these tools, it may be impossible to get the job done.
The few necessary tools that you will need to get rid of your bike crank without a puller are listed as follows:
1 ) Old rags to dust off the dirt. ( Buy On Amazon )
Using a dry or damp cloth can help, but wipes are preferable.
2 ) Alley Keys ( Buy On Amazon )
The universal keys that are used to open various type of machines
3 ) Spindle driver ( Buy On Amazon )
Situated at the heart of the crank, the spindle is a rotating axis of the crank. A spindle driver is a specially designed driver to remove spindles.
4 ) Suitable crank nuts and bolts for your bike
There are two common types of nuts usually found in bikes.
- The smaller ones – M8. Use CCP- 22 to loosen this size of the nut.
- The larger ones – M12 and M14. Use CCP-44 to loosen this size of the nut.
Miscellaneous Tools and Equipment
- A bottle of WD-40 ( Buy On Amazon )
For smoother and noise-free rides, apply this lubricant to your bike’s chain.
- A Bike Crank extractor ( Buy On Amazon )
This tool is used to remove the bottom bracket of your bike.
- A Bike Cassette remover ( Buy On Amazon )
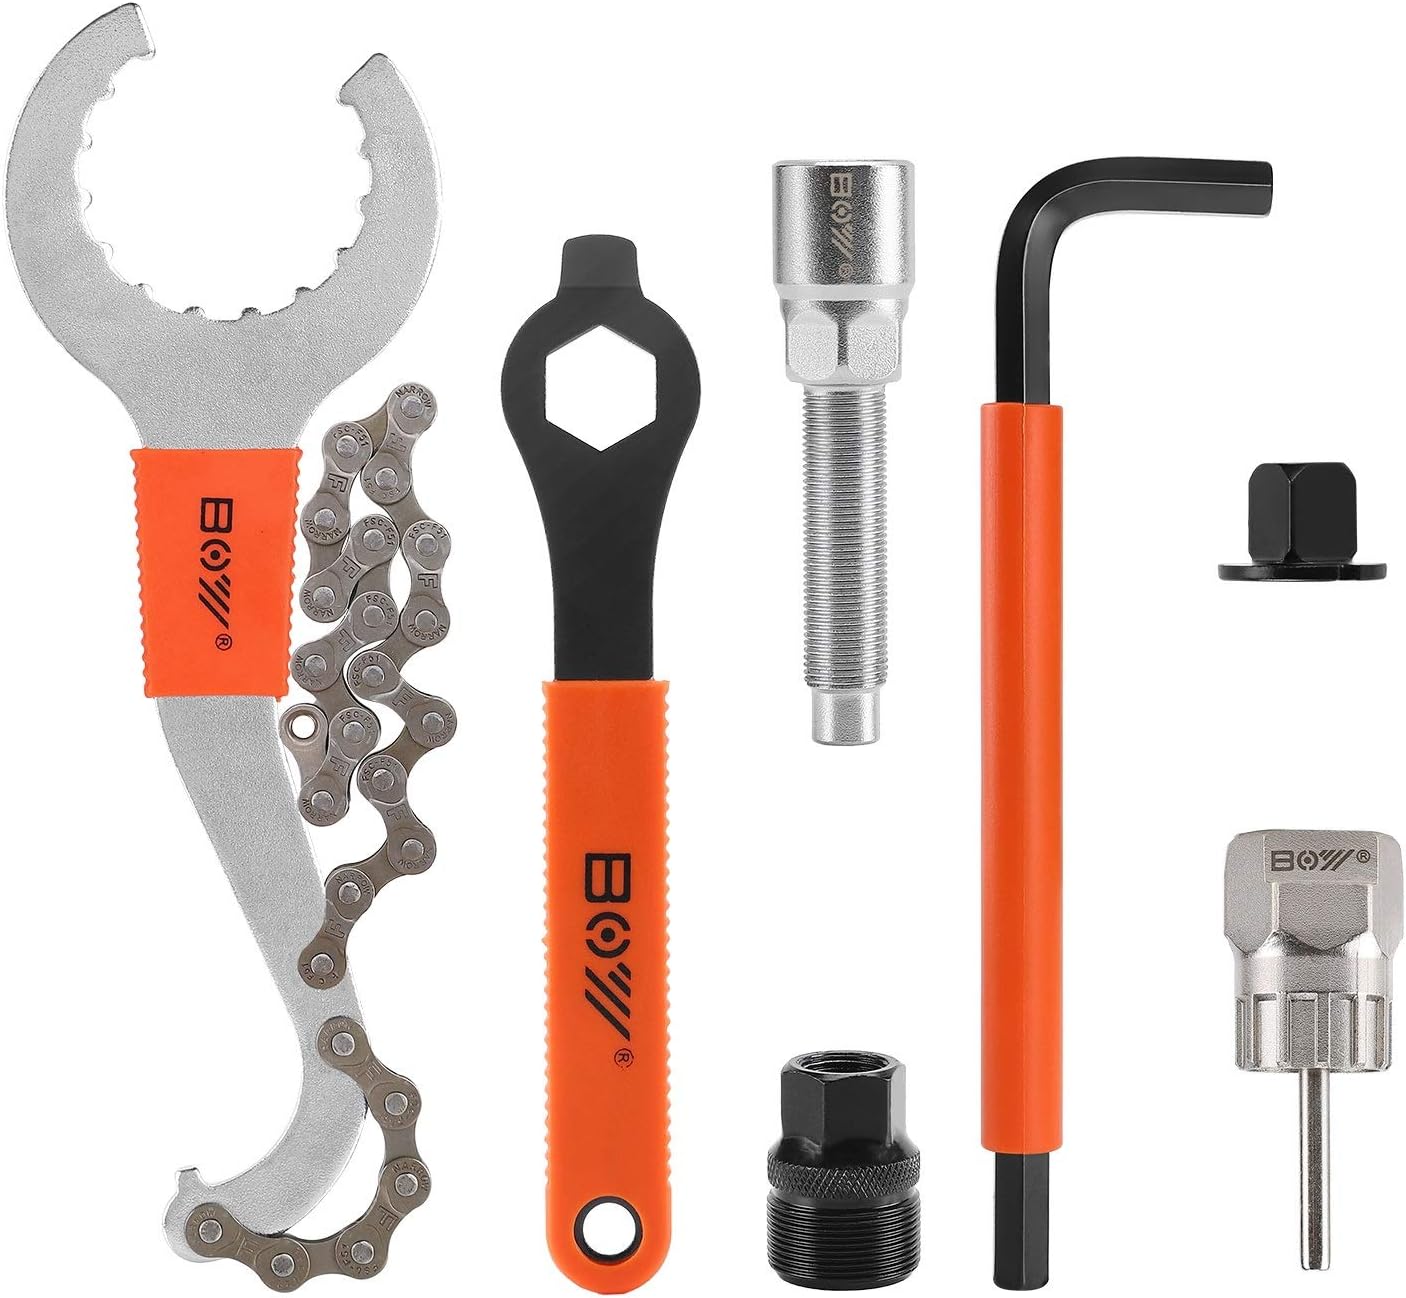
This tool comes with various types of wrenches like lock ring remover wrench and auxiliary wrench. Apart from that, it also contains a chain whip.
- Bike Stand ( Buy On Amazon )
To keep your bike erect while you’re working on it.
Easy Steps To Remove Bike Crank Without Puller
Before you start with the process, it’s essential to identify what type of crankset it is.
Just in case it’s a self-extracting crankset, scroll down to the part – How to remove self-extracting crankset.
The process of removing the crank from your bike is a cakewalk if you have minimal mechanical skills. It does not require you to be a know-it-all.
With a minimal idea of how things work, it might take up to a few hours to get the job done.
However, it is advised to use this method only if it is an emergency where you cannot reach an expert or a professional to help you. It is recommended to reach out to them for such work as doing it yourself might take a lot of time if you do not own any experience. Now, without any further ado, let’s get started with the process.
The tools and materials required in this process are already mentioned above.
The steps to disconnect your bike’s crank without a puller are as follows:
1. Protect your hands
This should be your foremost priority when working with any mechanical parts. Use rubber gloves if possible, as they can provide utmost protection to your hands.
Leaving your hands bare can be prone to injuries, not just by the crank but other parts too. The professionals advise it. Ergo, before starting with any kind of work, make sure your hands are covered.
2. Start with removing the crank bolts.
For this process, you’ll need a universal wrench. Simply turn all the nuts/bolts counterclockwise to loosen them. Once you make sure the nuts are loose, remove the crankset and stick out to the crank of your bike.
Note: Do not hurry during any of these processes. As they say, “Haste makes waste.”
Once done now remove the washers carefully. If you’re a recruit and have no idea what a washer is, a washer is a straight metal disc that helps the nut and the bolt remain tight.
Carefully remove all the washers using a spanner tool and keep them aside.
They’re usually located under the nuts.
3. Identify And Remove Crank with Coupler
Nuts and Bolts are available in various sizes, and it’s essential to identify the size of the nut and bolt used in your bike and choose proper tools accordingly.
For smaller cranks like an M8 crank bolt, use a CCP-22 or a CPW-7 to get the job done.
For larger cranks like M12 or M14 Crank bolt, use a CCP-44 to get the work done.
Now to take out the Coupler with threading on both ends; it is advised to use a hex tool and a spanner or a screwdriver. Once you have got the right tool, with not much pressure, turn the coupler until you can quickly move the hex around. Try not to remove it wholly as it may damage the surface.
4. Disengage the arms of the bike’s crank
Mind you; this process will test your arm strength to certain limits. Take out the spindle using the spindle driver.
Once you’re finished with the previous task, it’s time to tighten the spindle with the arm of your bike. The process might look more complicated than it is. You simply slide the driver right into the spot and rotate it in the anti-clockwise direction until it’s tight.
To disengage them, you need to rotate the spindle in a clockwise direction. Do not apply too much pressure as you might end up hurting your hands in this process.
5. Remove the Crank arm puller tool.
Once you’ve disengaged the crank arm from the body, all that is left is to remove the crank arm of your bike. Again, avoid using a lot of force; you might end up injuring yourself.
Next Do it on the other end as well.
By now, you’ve successfully removed one side of the crank. Use the same method on the other side as well. Make sure to follow each step here with caution. Failing to do so might end you up in a bad situation.
In case you already are in a situation like this, do scroll down and check ‘Time to get help.’
How to remove a Self Extracting Bike Crank
A self-extracting crank in a bike moves even without the help of a puller; that’s the easiest way to understand whether your bike has a self-extracting crank or not.
In a self-extracting crank system, the retaining ring itself acts as a crank bolt and functions as a crank puller once the crank bolt is loosened.
That makes self-extracting cranks preferable as it takes only one tool to remove the crank- Alley Keys. But is that it? No, for sure, that not all you would need.
There are always specific miscellaneous tools and equipment that are required in such processes- A pin spanner or a hex wrench for the retaining cap and bolt, a mallet to push your crankset to the other side of your bike, and a wipe/rag to keep the area and your hands clean.
Note: Not every crankset is the same. Sometimes it is not necessary to remove the retaining ring. Ergo, it is advised to identify the type of crankset you’re working with.
- Remove the retaining cap using a pin spanner.
- Then remove the arm using a Hex wrench. Turn counter-clockwise until the arm falls off away from the spindle.
- Once that is done, you will be left with the other side of the arm. Pull it out slowly or use a mallet to do so.
- Here you go, you’ve successfully removed your elf extracting bike crank.
These four steps will help you extract your bike crank without any inconvenience.
Time to get help
Understand when you’ve gone too far with the process and, in such times, dive for help.
When you’re unable to do anything or get stuck in a circle, neither should you panic, nor should you continue applying force in any case.
Doing so might lead to a bigger problem might even lead to permanent damage to your bike. If we had to put this in a sentence- “Better safe than sorry.”
In such desperate times, seek help from professionals. Look for a nearby Bike repair or a Bike mechanic to help you with this problem.
The problem can range from merely fitting your threaded bolt in your crank to getting your crank stuck in your bike. If you find yourself under a similar circumstance like this, then seek experts’ advice, as it’s no use crying over spilt milk.
3 Best Crank Puller To Get The Job Done

Park Tool CCP-22 Bicycle Crank Puller
If you wish to remove the crank from your bike without damaging its surface, then this is your way to go!
One tool to remove your bike cranks within minutes- The Park Tool CCP-22. This tool is built to remove crank arms from bikes with smaller nuts such as M8 nuts and bolts. The significant part about using this tool is removing even the tightest cranks without putting much force into it.
If you own a Bosch-E Bike, then CCP-22 is your way to go; not only does this tool perfectly fit on the SRAM PowerSpline Cranks, but also, BNI Cranks.
With comfortably long handles and healthy rotating tips, this is one of the best bike crank removal tools with long shelf life.
Park Tool CCP-22 Bicycle Crank Puller: Check Price On Amazon!

3 in 1 Multi Bike Cassette Removal Tool
One tool, three jobs: Save some space in your toolbox with this tool.
Solely with this 3 in 1 Cassette removal tool, you can remove your bike’s crankset and crank. This tool can save you from getting a hole in your pocket and standing out as a smart cookie in front of friends and family.
The three tools include a chain whip, an auxiliary wrench tool, and a cassette removal tool. Using this tool, you can get three things done at the same time. Ergo, this 3 in 1 Cassette removal tool can easily replace three tools from your box, save you money, energy, and a lot of time.
3 in 1 Multi Bike Cassette Removal Tool: Check Its Price On Amazon!

Bicycle and Bike Crank Extractor Puller
Remove crank arms from your bike in a jiff with this Crank extractor.
This tool is a universal tool for three-piece crank systems with a long life.
Compatible with SRAM PowerSpline, Shimano Octalink, ISIS Drive, and Bosch BNI e-bikes, this tool has a robust rotating tip that ensures smooth operations, i.e., without any kind of hassle.
This tool is specially designed to fit square tapered and splined spindle crank arms and will get your work done without inflicting damage on your bike.
Bicycle and Bike Crank Extractor Puller: Check Price On Amazon!
Ending note
As we get closer to the end, we can answer the query of whether or not it is possible to remove a bike crank without a puller. The answer remains positive. But as they say, even roses have thorns.
Even though it is possible to remove a bike crack without a puller, it leaves an open mark for some permanent damage to your bike; one should only use this method when they’ve nowhere to go.
And I guess that is all for now. We hope this article about Removing a Bike Crank without a puller helps you in any way. Until next time, ta-da!
Also Read,
How To Remove And Repair Bike Chain Without Special Tool


Leave a Reply