Whether biking is your thing or you simply break out the bike once in a while for a relaxing ride, it’s inevitable that sooner or later, you’ll encounter rust. So it’s better you learn how to remove rust from the bike chain using household products that you can find anywhere around you.
Rust is a natural chemical reaction that happens when the metal comes into contact with water, mud, oxygen, or even moisture.
Some people believe that it’s pointless to attempt to clean a rusted chain but that’s actually not true in many cases. Rust has different stages and depending on the stage of rust occurring on your bike – you may be able to use household products to get your once rusted chain, looking like new again.
Today, we are going to walk you through the process of removing rust from your bike chain using household products. Before we begin, grab a towel or blanket, some lime juice, a scrubber, a cloth, a bucket of hot water, dish soap, bicycle lubricant (optional), and some strong paper towels and let’s begin.
7 Easy Steps To Remove Rust From Bike Chain
Step 1: Get your bike ready for you to inspect
Place the bicycle on the stand. Although not directly part of the bike maintenance procedure its a good practice that allows you to better inspect and clean the bike.
Further, it helps reduce the risk for getting knock and thus falling over when doing the work.
Ideally you should always use your bike stand for any kind of maintenance. It let you have a clear view as raising the bike a little helps with cleaning operation of the drive train and chain assembly.
You’ll need to know exactly what you’re working with before you begin so you’re going to want to either flip your bike or secure it upright using a rack or hook. When doing it for the first time It will be easier if the bike is flipped though because this will give you the easiest access to your bike chain.
If you’re worried about scraping your paint job, simply lay a towel or blanket down first and then flip your bike on top of it. Now that your bike is secure, you are ready to inspect it and see what you’re working with.

Step 2: Inspect the bike chain for damage
This is the part that will help you know whether you can fix the chain by simply cleaning, removing the rust, and lubricating it, or whether your bike needs a new chain this time. It will also suggest how much cleaning you are required to do and how long the complete de-rusting operation will take.
Look at the chain closely to evaluate its condition. If you notice deterioration or warping along with the rust – you may want to consider buying a new chain.
If you only notice rusting and possibly some crustiness – you’re in luck because you can clean your chain using the items mentioned above and have it looking like new again.
It should be noted that keeping a chain clean and lubricated can significantly extend its life. Depending on the results of your inspection – you can now get ready to clean your chain.
If you noticed the rust was only in the beginning stages, you likely don’t need to remove it so you can skip steps 3 and 6, and don’t worry about soaking your chain either.
Step 3: Removing your bike chain
To remove rust from the bike chain its standard practice to first remove the bike chain so it would be much easier to clean later. If you’ve noticed crusting along with the rust, you will need to remove it to properly clean it.
Otherwise, in most cases you may be good with the chain kept on. Thankfully, remove your bike chain is simple when you know what to do and are equipped with the proper tools.
Even if you don’t have the specific tool made for the job, it is possible to improvise a solution with a variety of likely objects in your home. I have put together a complete article, “How To Remove A Bike Chain,” on the steps involved in removing the bike chain with easy video instructions.
But in short, let me summarize things here in a more straight forward way. If you have a newer, more modern bike/chain then you’ll start by finding the master link.
This is a link in the chain that can be easily removed; it will look like a special slot or pin connection.
You can use this and easily slide the pin or slot out in order to disconnect and remove your chain. Not every modern bike will have one either so if you can’t find it, it’s possible that you just don’t have a master link.
If you don’t have a master link then you’ll just have to pull the chain off the drivetrain and then the rest should be able to come off fairly easily.
Regardless of whether your bike has a master link or not – you may want to take some pictures of the drivetrain before you remove your chain.
Be sure to capture all angles so that you’re able to remember exactly how to put the chain back together when you’re done cleaning it. If you put the chain back in the drivetrain the wrong way, your bike may not work properly and you risk breaking your bike or even worse, injuring yourself.
Step 4: Wipe out the dirt and degrease the chain
To remove rust from the bike chain you should always wipe out the dirt using some clean rags followed by the brush of different sizes to reach between the deeper parts of the chain assembly.
For example by using tooth brush or bristle brush you can reach between the side plate and central roller.
You’re going to want to take a cloth/rag/brush and rub the chain through it with a degreasing product to remove grease and build up. If you don’t have a degreaser such as WD-40 ( Buy one on Amazon ), you can substitute by using dish soap/detergent/washing soda with water.
Then you will soak the chain (if heavily rusted) in the degreaser (or substitute) for 15-20 minutes. Have some hot water ready to rinse the chain with when you remove it from the degreaser.
Anything with low to mild rust would already be clean by now but for some older chains with heavy rust build up its time for attacking your bike chain with mild acid of the citrus lemon.
Squeeze some fresh lemons and collect the juice in some container. You may also use kerosene oil as an alternative if its already available to you in the first place.
Step 5: Scrub with lime juice hard on the chain rust
This part will be hard on your hands, so you may want to wear gloves. Any scrubber will do, but for the best results, you will want to use a steel wool scrubber ( Find one on Amazon ).
You will want to still have some hot water nearby because your scrubber may end up with build-up with rust and crust so it can be handy to rinse it periodically in some hot/warm water.
This known de-rusting technique can really work wonders but you’re going to need to put in some work. Dip your scrubber in your lime juice and start scrubbing. Focus on the most rusted areas first and use a paper towel to clean the areas off when you are done.
If you wash, lubricate, and clean your bike on a regular basis, you might just not need to do much effort in the step. Use a bristle brush or toothbrush to get into the tight areas.
Now that you’ve scrubbed away the rust, you need to rinse your chain with some warm, soapy water. Even though lime juice was used to clean the rust, if you leave it on, your problem will come back quickly and likely be worse than before, so it’s important not to miss this step. Use a rag to dry off the chain after you finish rinsing it.
Step 6: Reattach the chain and check the chain motion
This is when those photos will come in handy; remember, you have to reattach the chain in the drivetrain the same way you removed it so that you don’t break your bike or risk injury to yourself. If your bike has a master link, now is when you will need to reattach it as well.
Before you flip your bike back over or remove it from its rack or hook, you’re going to want to check and make sure your chain is properly attached and ensure there is no unnecessary resistance.
To do this, all you need to do is give your wheels a spin using one of your pedals. As long as everything moves smoothly, you are one step away from being ready for motion.
If there’s a problem, double-check the pictures you took to ensure they match the chain. You can also try watching a video tutorial, like the one mentioned above, if needed. If you want free video editors, check out Adobe Express tools.
Once you find and fix your issue, test the chain motion again. If all is good, move on to the final step.

Step 7: Lubricate your chain and you are ready for motion
It should be noted that this step is optional but important if you want to ensure your bike chain has its maximum possible lifespan. Dry the chain and reconnect it to the chain drive and derailleur.
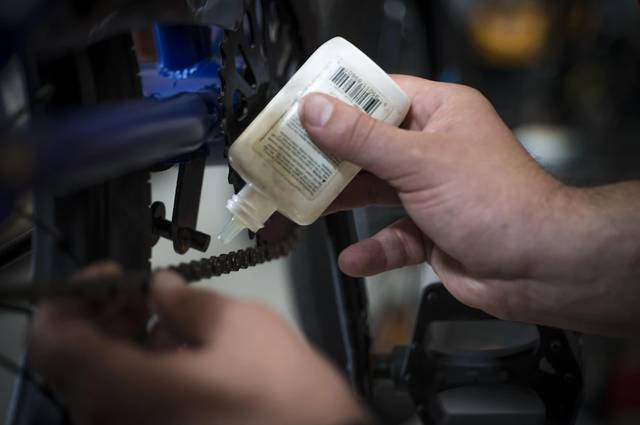
Now that your chain is rust-free, you’ve reattached it and tested it. You’re ready to lie on the lube. Just make sure the chain is completely dry before you apply lubrication. Apply a thin layer of lubricating oil evenly to the whole chain by spinning the wheel slowly as you apply the lube.
Clean off any extra lubricant using a towel or tissue. Once you’ve finished, you can flip your bike, and your job is done. As long as your chain wasn’t overly rusted, it should look new now.
If you keep it clean and lubricated, rust won’t build up as quickly, but when it does, you know how to remove rust from the bike chain with seven easy steps.
Also Read,
How To Remove A Bike Chain With Easy Video Instructions
Is WD-40 OK For Bike Chains? Truth About WD-40 And Bike Chain
How To Remove Rust From Bike | Best Ways To Clean & Get it New!


Thank you for sharing