When it comes to cycling, hopping into the saddle and gripping the handlebars are just the preliminaries. It’s not until your feet touch the bike pedal that you truly begin to ride.
Pedals are workhorse components. They endure near constant force as you churn through the miles.
When you stand on them, you probably never consider that you’re putting the whole weight of your body on those two humble parts.
When a pedal breaks, it’s a catastrophe. Trying to turn those cranks without them is awkward and painful — if you can manage it at all. I still have memories from childhood of trying to pedal home on just a spindle under my right foot. I ended up walking.
Thankfully, replacing pedals isn’t a difficult process.
In fact, with a bit of knowledge and the proper tools, it’s downright easy. To start, it’s helpful to know the parts of the pedal, and how they differ across the spectrum of variants available.
The Anatomy of a Bike Pedal
At the most basic level, while you may probably think of a bike pedal as one piece, it’s actually made up of two distinct parts: the spindle and the body.
The Spindle
Look at any pedals. You’ll see that there is a cylinder that runs from the bicycle crank through the pedal’s center. That’s the spindle.
A spindle is simply a type of axle that allows for something to spin freely around it. The way the body of your pedal smoothly tilts in response to your feet, and maintains its orientation as you turn the crank, is a perfect demonstration of this function.
This is also the piece that attaches to the crank. Just above the threads, you’ll notice on some spindles that parts of the cylinder are flattened. These are called wrench flats, and provide a gripping point for your tool.
Spindles without flats have a hex fitting within that mates with the appropriate type of wrench.
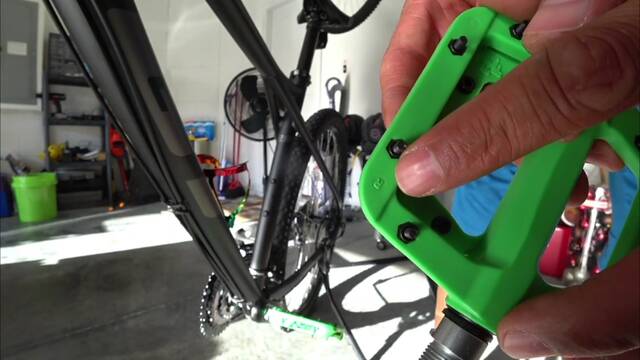
The Body
The material surrounding the spindle is the pedal’s body. This is the primary contact surface for the feet. The pedal body captures your pedaling force, while providing textures or mechanisms for grip.
The type of pedal you’re using is determined by the body, and there are more types than you might expect. The main varieties are:
Platform Pedals: The most straightforward, common body type, these provide a wide, flat, textured surface for your shoes to engage.
Toe Clip or Strap Pedals: This variant has a metal or plastic cage, or series of straps, at the front of the pedal to secure the toe of your shoe. The result: greater stability and control.
Clipless Pedals: The most advanced type of pedal, clipless designs require special shoes with a cleat attachment that locks into the pedal itself. This allows for increased control in all pedal positions.
Regardless of the body type you prefer, removing and changing your pedals will follow the same process. However, pedals with clips or other securing mechanisms provide visual information that can help you quickly determine correct pedal orientation.
Before we get into the actual process, a brief overview of the tools is necessary.
Tools You’ll Need | The Pedal Wrench
As with any repair or replacement procedure, using the appropriate tools can be the difference between a smooth process and a curse-filled struggle.
Changing pedals is a breeze so long as you have the equipment you need.
Open-end Pedal Wrench
This wrench is designed to use on spindles with wrench flats. It has a narrow head, designed to fit easily onto the equally slim flats, which are typically 15 mm wide.
The pedal wrench also has a long handle for greater leverage, and is often angled for easy manipulation clear of the bike frame.
A regular open-end wrench lacks these features, meaning it will be harder to use, and could actually cause damage to the spindle or ruin the wrench itself.
Most spindles have a 1/2in or 9/16in diameter. Measure yours to make sure you purchase a bike wrench with a properly sized opening. Find one on Amazon!
Pedal Wrench for Hex Fittings
On more modern bikes, you’re likely to find pedal spindles that don’t have wrench flats. Instead, they rely on an internal hex fitting to secure and remove the pedal to and from the crank.
The fitting can be accessed through the crank arm where the pedal is attached. Pedal wrenches for this type of setup are similar to Allen keys, but feature the same long handles as their open-ended counterparts for leverage.
Bike Grease
While not a tool exactly, bike grease is required for proper pedal installation. Without it, the spindle threads can rust, or seize up within the crank.
There are a multitude of bike grease compounds available, and different riders swear by different brands. While any reputable brand should perform adequately, make sure you choose an anti-seize compound particularly.
This sort of grease is made specifically to protect metal-on-metal connections such as the spindle and the crank, in addition to providing all the same protections as other grease formulas.
Removing and Changing Bike Pedal
Now that you understand what you’re working with, and have assembled the necessary tools, you can get down to business. Follow these simple steps to swap out your pedals without breaking a sweat.
Step 1: Position your bike so it is stable and secure, and guide the crank to its lowest position to minimize movement, and assist with leverage.
Step 2: Slide your pedal wrench onto the flats, or in the case of a hex fitting, insert the wrench head through the crank arm and into the hexagonal socket.
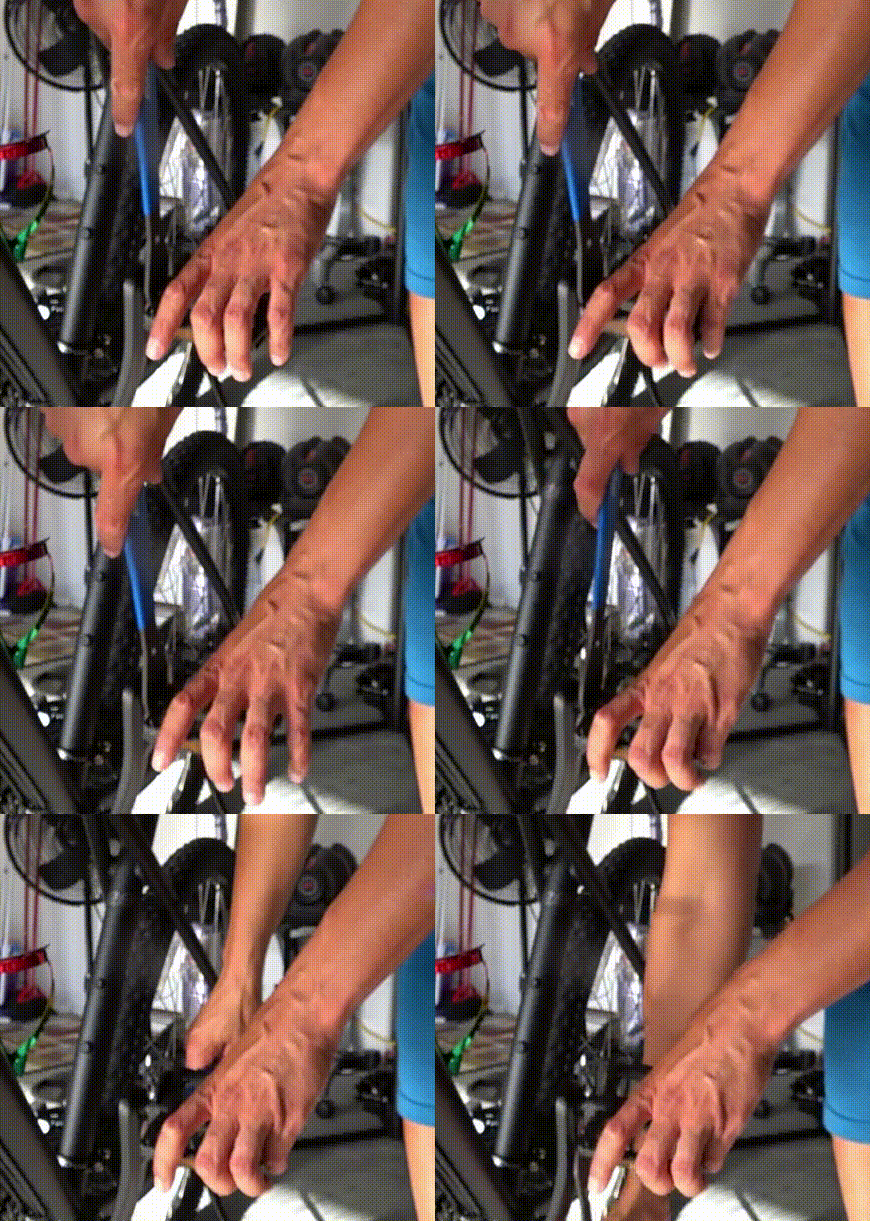
Step 3: Screw the pedal off. Turn the right pedal to the left (counter-clockwise) to loosen. For the left pedal, turn to the right (clockwise).
Step 4: Examine the replacement pedals to determine which side they are paired to. There should be left (“L”) and right (“R”) markers on the spindle.
If toe clips are present, make sure they are facing towards the bike front.

Step 5: Grease the spindle threads according to the product instructions.
Step 6: Align the spindle with the hole in the crank arm, insert it, and screw it into place. Turn the right pedal right (clockwise) to tighten. Turn the left pedal left (counter-clockwise).
Step 7: Make sure the pedals are well tightened. The recommended torque is around 30 lbs and will be achieved when you feel yourself begin to strain to turn the pedals with your wrench.
And that’s all it takes. In as little as 15 minutes you can be done and ready to ride.
Now that you see how simple it is, you can save yourself a trip to the bike shop and handle this yourself. Assuming, of course, you recognize when it needs to be done.
Left vs. Right Pedal Threading Explained
Bike modification requires a piece of knowledge to complete the task efficiently. If you have changed pedals previously, then you are aware of their mechanism, that which pedal belongs to which side.
When you are buying a pedal set, you will get an idea of which one is the left and the right side pedal.
The manufacturer always mentions left or right on a small sticker that you will find on the pedal. The right pedal has the right threaded tool that can become righty-tighty and lefty-loosey.
The threading in the right pedal will have upwards threads that allow you to tighten the pedal efficiently.
The left pedal has the left threaded tool with lefty-tighty and righty-loosey experience while installing the pedal. The unusual threading in bike pedals makes it a safe pedal, which never falls off while riding your bike.
You may get a little frustration while you first change your pedals, but understanding the correct thread will nullify the errors you may experience while pedal changing.
Likewise, the left-right pedal threading helps you know when the proper installation.
How To Install Bike Pedals
When you are ready to install new pedals on your bike, then you need to figure out the right pair of pedals that your bike needs. Check the “L” and “R” mark on your cycle before installing the pedals, and also, you can go for pedal threading to know the right pedals.
Then, when your bike is ready to take the pedals in, you can go with the lubrication and make it a perfect one before installing the pedals.
Let’s go step-by-step methods you need to go through while installing new pedals on your bike and maintain a perfect balance of left-right pair.
- Heavily put some grease on the threads of your pedals. Also, lubricate the crank arm that can smoothify the process where you can get a smooth installation.
- Use your fingers on the wrench flats, and thread the perfect pedal on the right side of the arm. You can use a wrench to snug the pedal, where you will need some more efficient tools if you are using unique pedals.
- Take an excellent mechanical advantage by putting the wrench on the flat. It will help you perform the installation smoothly, where you can go with multiple rounds while installing the pedals.
- Hold the arm from one hand and use the other hand to hold the wrench, where after putting the pedal on, rotate it in the opposite direction, so the pedal goes into the arm crank quickly.
- After rotating, you need to use the opposite arm as the lever, which will help you tighten the pedals. After done with the hands, go with the proper wrench and tight the pedals, which will help you get a fixed pedal on the bike.
If you find some damage on the cranks, you can go with some minor modifications in the pedals by using a tap-set that will help you install the pedals effectively.
When Should You Change Your Bike Pedal?
There are plenty of signs that your bike pedal has reached the end of their lifespan. Yours might be trying to tell you something if you’re experiencing any of the following:
Clicking, Squeaking, or Other Noises: Your pedals are meant to function quietly, so any noise is a symptom of a problem. It could be a simple matter of applying some oil to the spindle, or you might need to replace the pedals entirely.
Hitching or Seizing: If the motion of your bike pedal isn’t smooth, it’s time to swap them out. The bearings within the spindle may have worn down after long service, or the grease on the threads may have done all it can.
Heavy Damage: The body of your pedals can break or deform after hard knocks. Plastic bodies are far more likely to fail in this way. Regardless, pedals in such a state are neither safe nor effective. Replace them as soon as possible.
Worn Mechanism: Whether it’s the textured surface of platform bodies or the locking mechanism within a clipless pedal, heavy use eventually renders them less effective. If your feet are struggling to maintain purchase on your pedals, or randomly disconnect from the locked position, it’s time for a new set.
Conclusion
With a little knowledge and preparation, you can service your bike’s pedals just as effectively as a professional. So, whether you need to replace a pair of worn pedals, or you’re just interested in trying something different, take up your pedal wrench with confidence. You know exactly what you’re doing.
Also Read,
How To Remove And Repair Bike Chain Without Special Tool




Leave a Reply